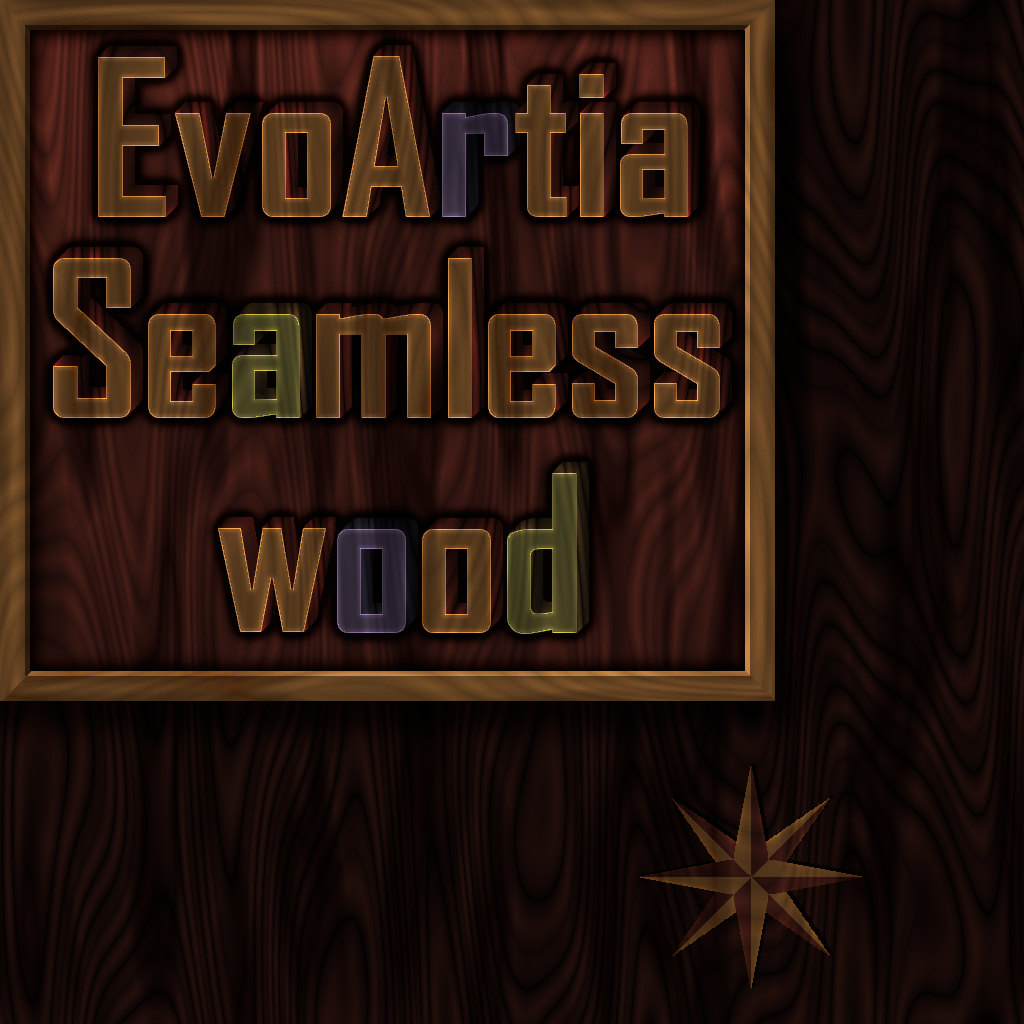
Seamless Wood Texture
This is tutorial for Gimp version 2.10.30
Seamless wood texture.
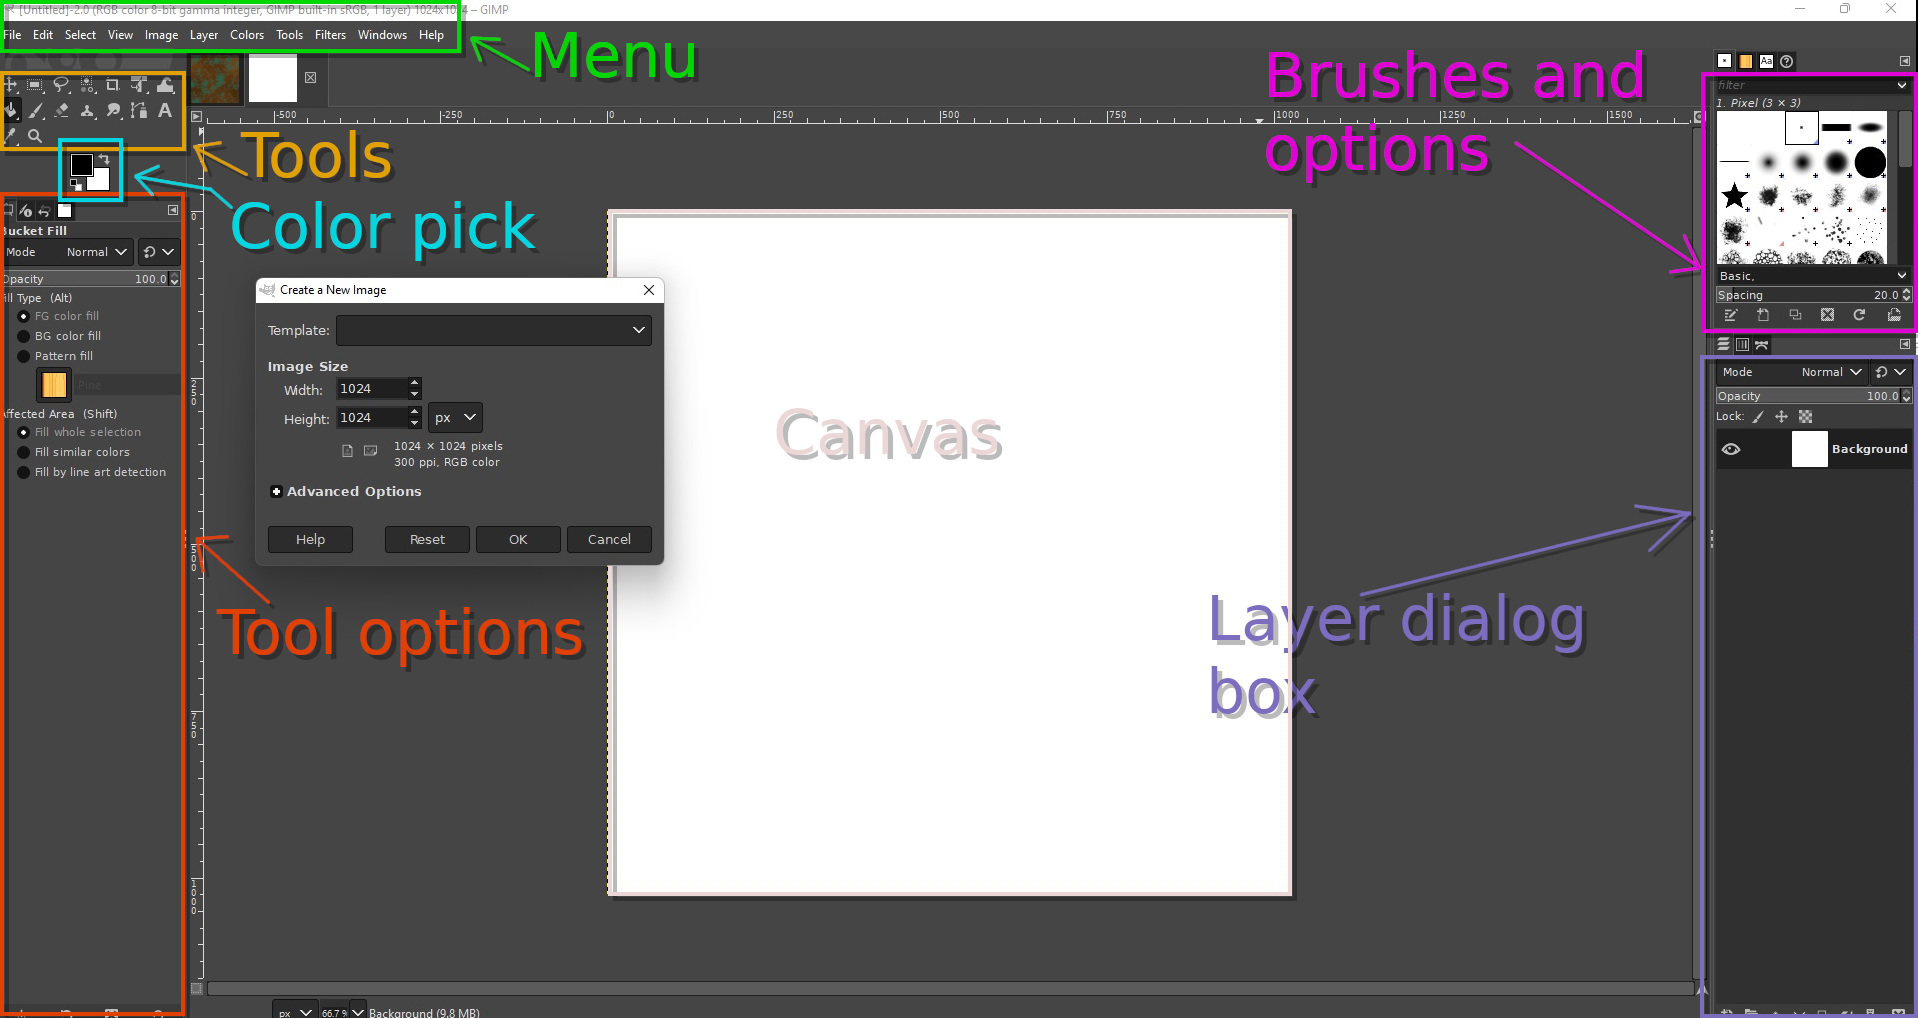
Hence trying to write tutorial beginner friendly as much as possible here is an image of areas I will be referring to. To zoom in and out of canvas hold down ctrl+scroll wheel. While zoomed in, to navigate left and right hold down shift+scroll wheel. Up and down just scroll wheel. Or just use scroll bars.
Step 1
- Fire up Gimp and Menu-File-New. Enter 1024 for X and Y for image size.
- Save your work. Menu-File-Save as. When choosing this option Gimp will save file as .xcf. It is nice, because all layers will be saved and can always adjust them. In order to save image using different extension go to Menu-File-Export as. In pop up window below will be + sign. Click on it and choose extension desired. For now, we will work with .xcf.
- By default, in layers dialog box there will be layer called Background. Double click on text next to layer and rename it to Sinus.
- Menu-Filters-Render-Pattern-Sinus.
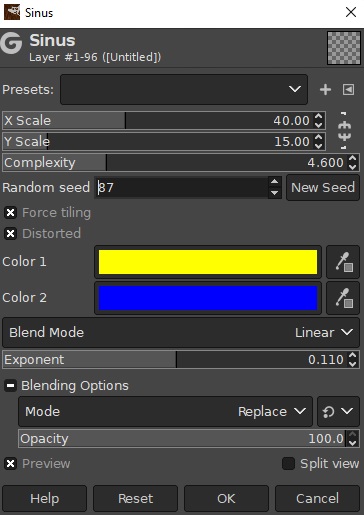
In pop up click on chain link next to X and Y Scale, so it is not scaling in uniform.
Make sure Force tiling and Distorted are checked.
X Scale – 40.00
Y Scale – 15.00
Complexity – 4.600
Random seed – 87
Blend Mode – Linear
Exponent – 0.110
- Create new transparent layer. Menu-Layers-New layer or Shift+Ctrl+N. In pop up by default fill with should be set to transparent, if not just make sure it is.
- Rename it to GreyNoise.
- Menu-Filters-Render-Noise-Solid noise.
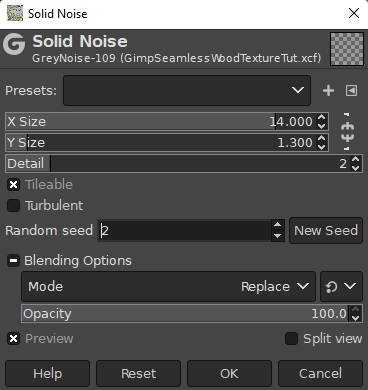
Click chain link next to X and Y Size so it is not scaling uniform.
X Size – 14.000.
Y Size – 1.300.
Detail – 2
Tileable – checked.
Random Seed – 2.
- Create new transparent layer and rename to WoodColor.
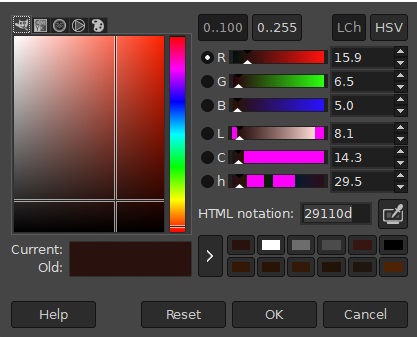
In color pick set foreground to HTML notation 29110d.
- In tool box select bucket fill tool, then touch anywhere on canvas to color it.
- In layer dialog box right click on layer GreyNoise and choose duplicate from drop down. By default duplicate will be called GreyNoise copy. Hide GreyNoise layer by clicking on eye icon next to it.
- Select GreyNoise copy layer and move it so it is positioned above WoodColor layer. At the very bottom of layer dialog box there are up and down arrows that allow to move layers.
- Duplicate GreyNoise copy layer again. By default it will be called GreyNoise copy #1.
- Duplicate GreyNoise copy #1. New duplicate will be called GreyNoise copy #2.
- In layer dialog box set GreyNoise copy #2 to mode Difference. Canvas will turn black but no worries! Menu-Colors-Invert.
- In layer dialog box right click on GreyNoise copy #2 and from drop down menu choose merge down onto GreyNoise copy #1.
- In layer dialog box set GreyNoise copy #1 to mode Difference and then merge it onto GreyNoise copy layer.
- Set GreyNoise copy layer to mode Overlay and set Opacity to 80.
- Merge GreyNoise copy layer into WoodColor.
Step 2
- Duplicate Sinus layer and hide it.
- Move Sinus copy layer so it is above WoodColor.
- Menu-Colors-Desaturate-Desaturate. Leave presets in pop up as is.
- Duplicate Sinus copy layer.
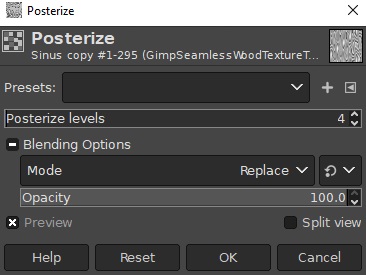
Sinus copy #1 layer selected - Menu-Colors-Posterize and enter 4 in Posterize levels.
- Set Sinus copy #1 to mode Difference in layer dialog box.
- Merge Sinus copy #1 layer into Sinus copy.
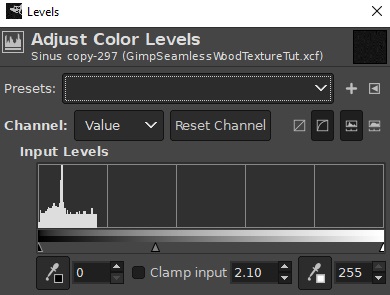
Sinus copy layer selected – Menu-Colors-Levels.
Gamma – 2.10
High input – 255
And we don't need to worry about output values.
- Rename Sinus copy layer to WoodBands. We can keep that layer for other wood projects so duplicate and then hide WoodBands layer, move it to the bottom of the layer stack.
- Set WoodBands copy layer to mode Dodge.
- You can try different layer modes for WoodBands as well adjust opacity.
This is what we have so far. And we are pretty much done!
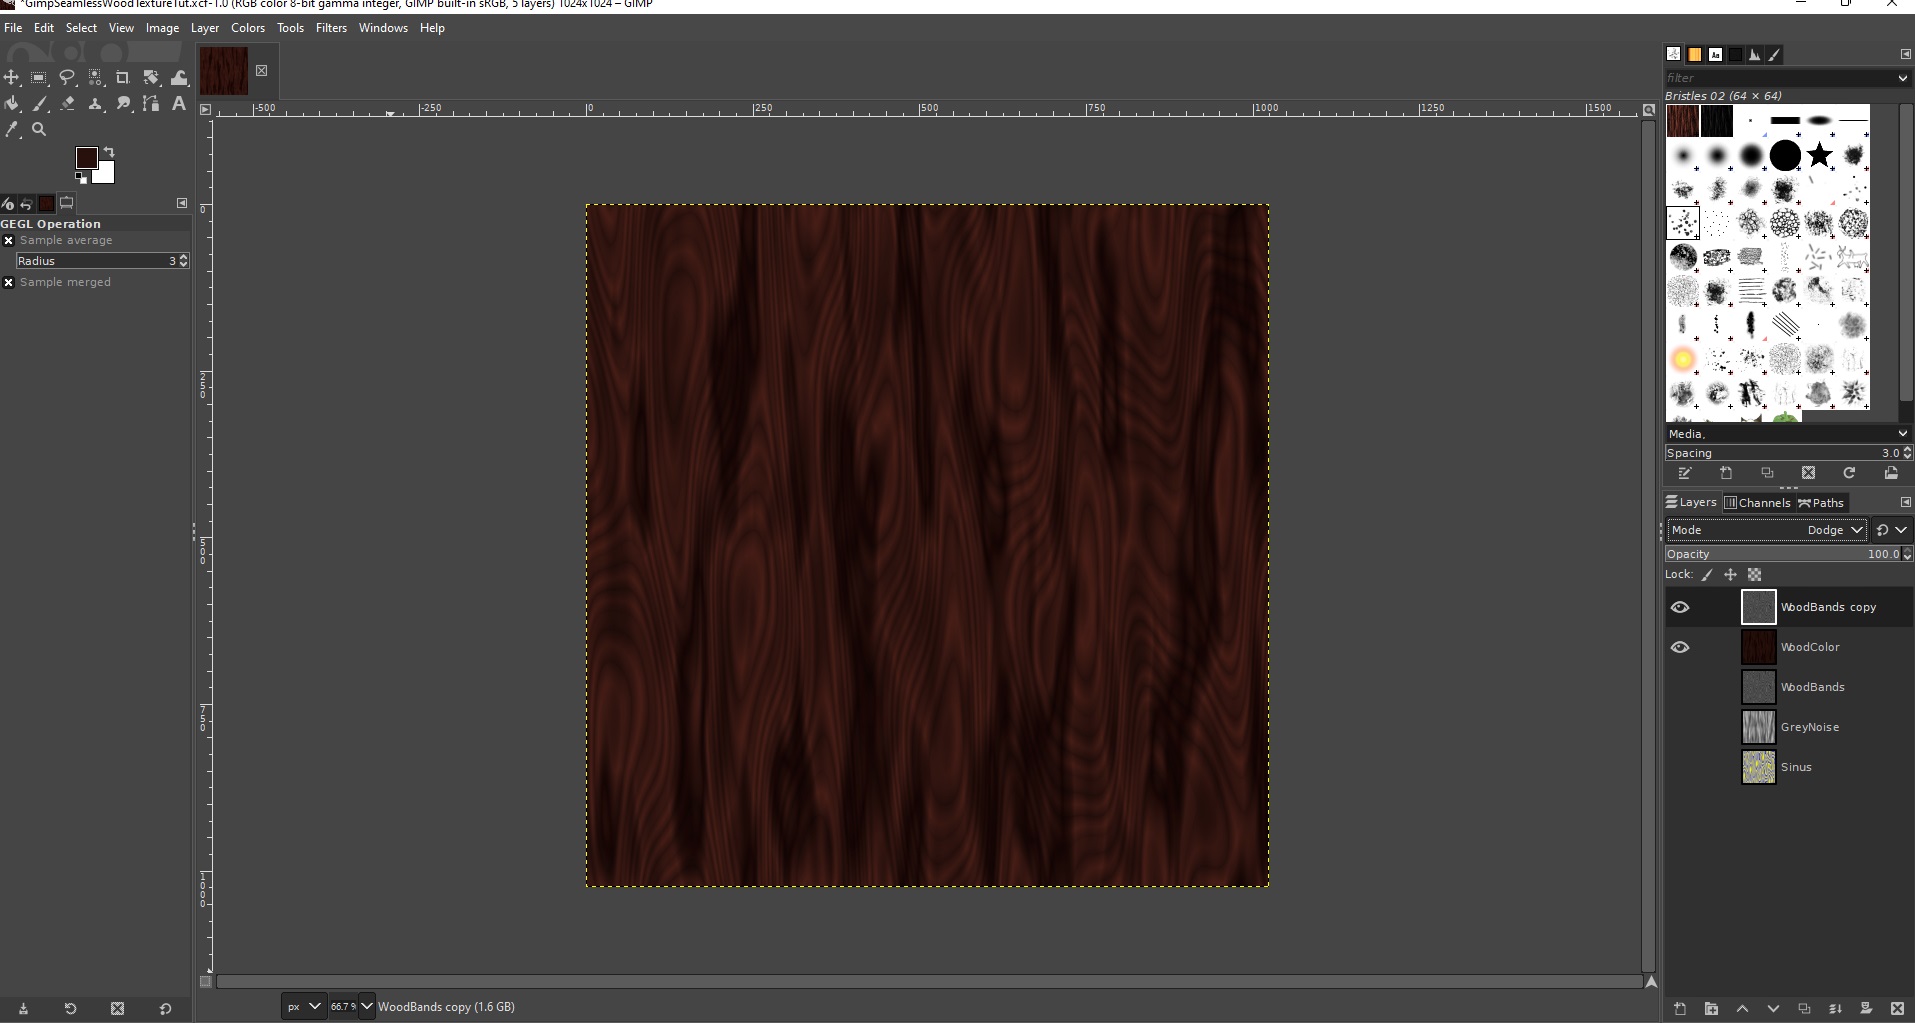
Here is my texture.
