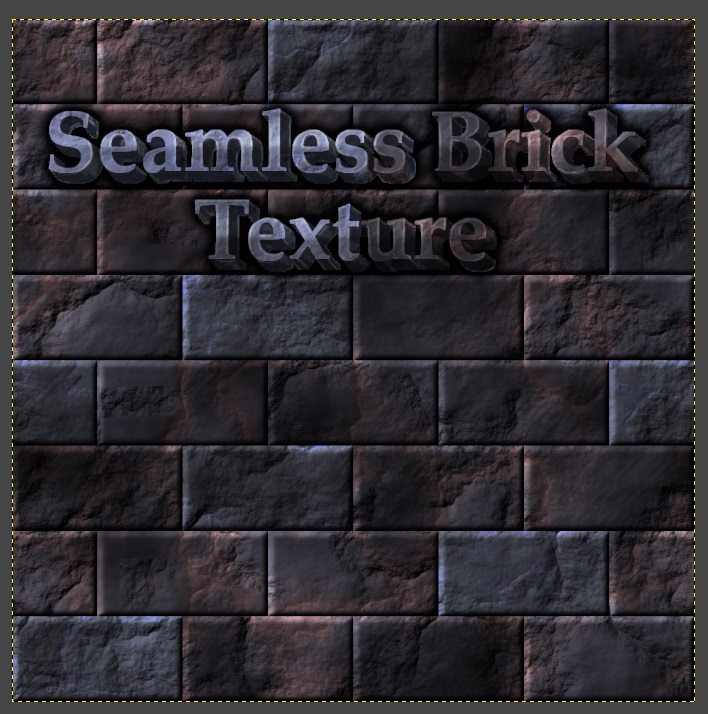
Seamless Bricks Texture
Seamless Bricks texture.
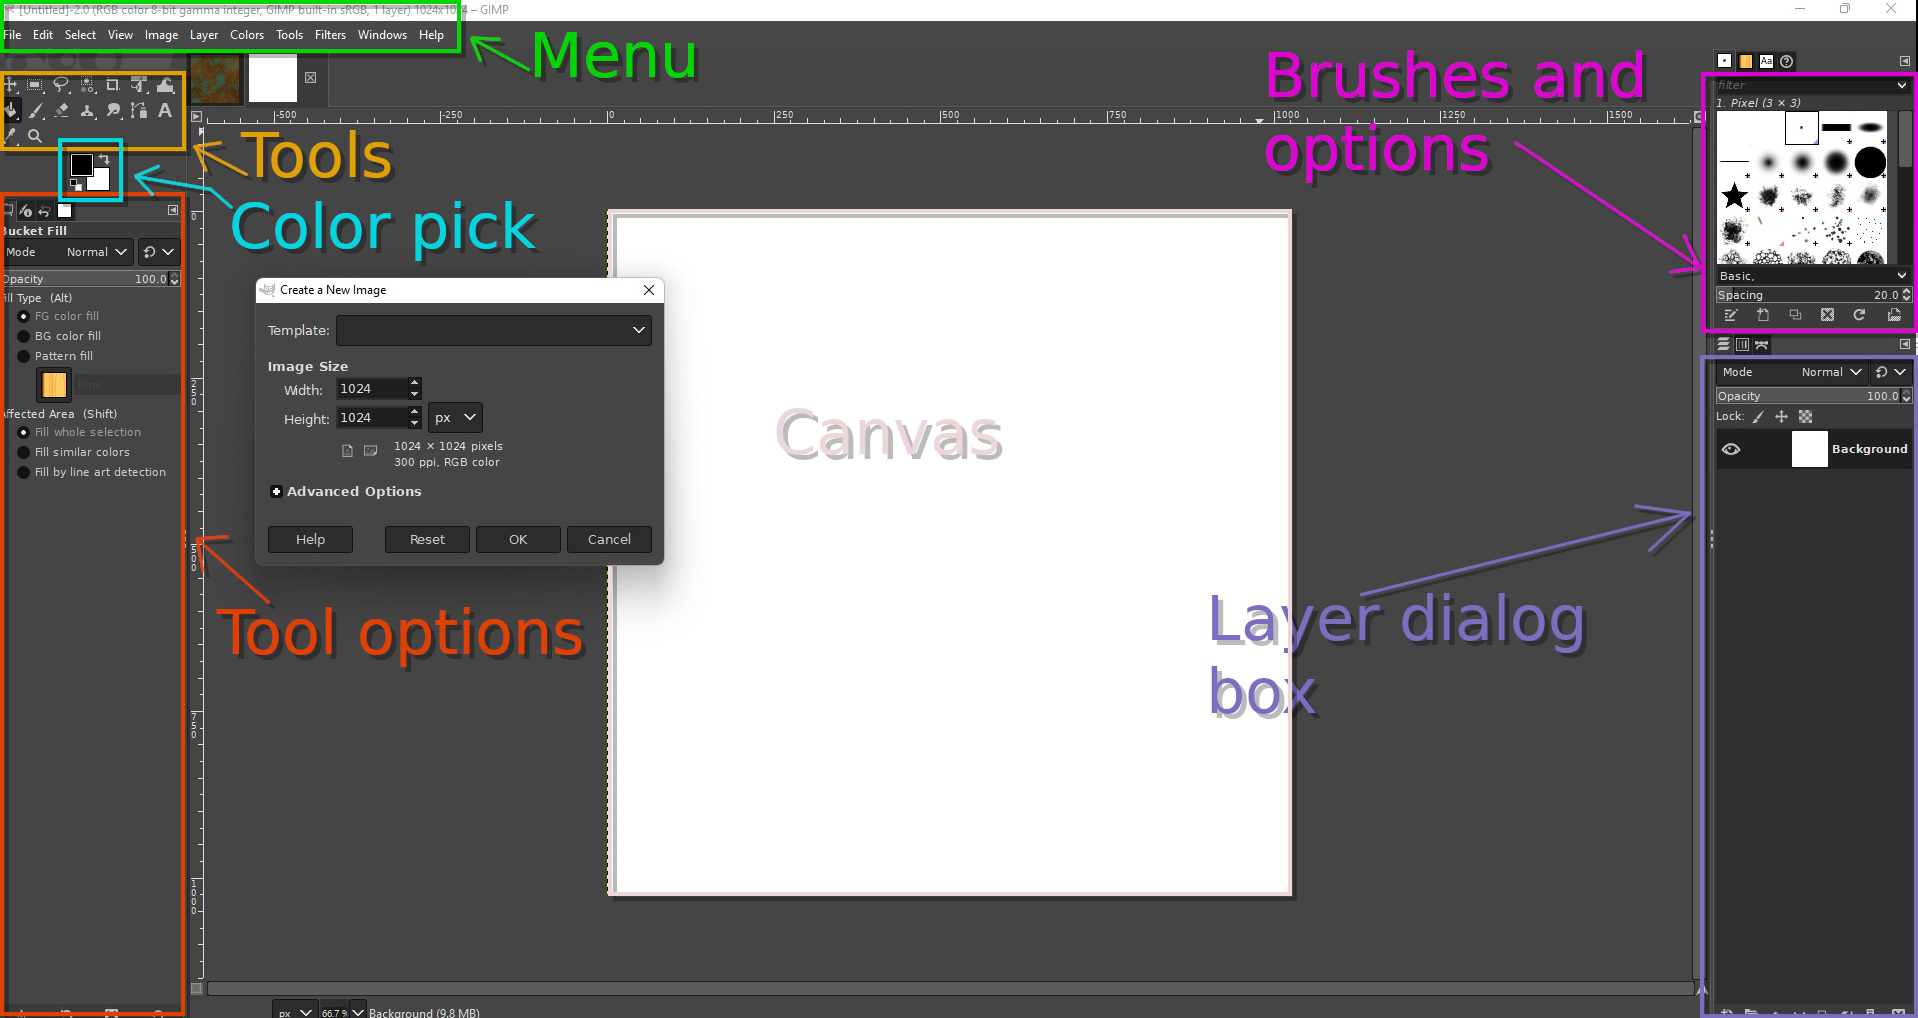
- Hence trying to write tutorial fairly beginner friendly here is an image of areas I will be referring to.
- To navigate around canvas. Up and down use scroll wheel. Left and right hold down Shift and use scroll wheel. To zoom in and out hold down Ctrl and use scroll wheel.
- Gimp by default saves files in it's native extension .xcf storing layers and alpha channels. Can always go back and adjust your work. Once new template is created go to Menu-File-Save as, call it what ever and save in desired location. In order to save images using different file extension go to Menu-File-Export As. In pop up at the very bottom there is a + sign and all extensions that Gimp can save.
Step 1
- We are going to create a single brick to begin with.
- Fire up Gimp and create new canvas Menu-File-New. For image size enter Height 128 and 256 Width.
- By default, in layer dialog box there will be layer called Background and white color.
- Hover over canvas and select all. Either use shortcut Ctrl A or Menu-Select All.
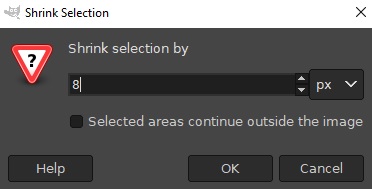
Menu-Select-Shrink and in pop up enter 8 pixels.
- Menu-Layers-Transparency-Add Alpha Chanel. And then hit delete key on keyboard.
- Deselect all. Either go to Menu-Select-None or Shift-Ctrl-A shortcut.
- In layer dialog box right click Background layer and from drop down chose duplicate.
- With Background copy layer selected go to Menu-Colors-Invert.
- And now we need to delete portion of black border. Same thing can be done quite a few different ways. We will use eraser tool.
![]()
In brushes select pixel brush.
- In Tool box select eraser tool.
- Zoom well onto image and erase portion of black border.
![]()
So it looks like this.
- In layer dialog box right click Background copy layer and chose merge down.
- Create new layer. Menu-Layer-New or Shift-Ctrl-N shortcut. In pop up leave values as is and hit okay. By default Fill With should be set to transparency and that is what we want.
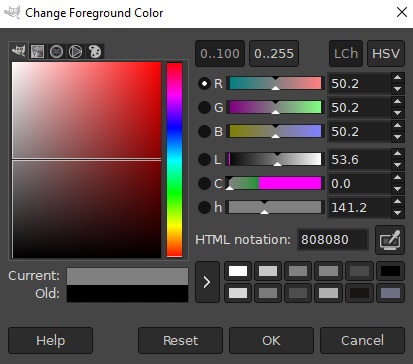
In Tool Box navigate to color pick and click little black square Foreground. In pop up enter 808080 for HTML notation.
Tip :) Save your work! It is good practice to do so, after each steps that you are satisfied with. Either go to Menu-File-Save or Ctrl S shortcut.
- In the tool box select bucket fill and in tool options set Fill whole selection.
- Click anywhere inside canvas to color it.
- Lets rename layer to Grey. In layers dialog box double click text next to the layer and once it is highlighted start typing, then press enter.
- Move layer Grey under layer Background. In the layers dialog box way way at the bottom are up and down arrows. With layer Grey selected use down arrow.
- With Background layer selected hit Ctrl A or Menu-Select-All.
- Menu-Select-Shrink and in pop up enter 4 pixels.
- Menu-Filters-Blur-Gaussian Blur and in pop up enter 2 for X and Y size, Hit okay. There will be a small artifacts at the corners but no worries we shall fix it.
- Deselect by going to Menu-Select-None or Shift Ctrl A.
- In the layers dialog box merge layer Background onto Grey by right clicking and from drop down chosing Merge Down.
- Menu-Filters-Blur-Gausian Blur and in pop up enter 1 for X and Y.
- Yay! We made lonely brick!
Step 2
- Create new file. Menu-File-New and in pop up enter 1024x 1024y. In layer dialog box rename layer to GreyBump.
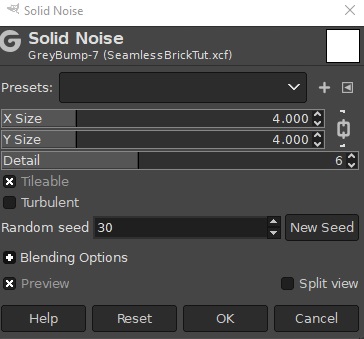
Menu-Filters-Render-Noise-Solid Noise. In pop up X and Y size by default will be set to 4.000 so leave it as is. Enter 6 for Detail and check Tileable. Set Random Seed to 30 and hit okay.
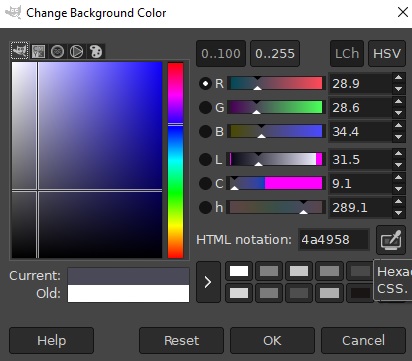
In color pick set Background color to NTML notation to 4a4958.
- Duplicate GreyBump layer by right clicking on it and from drop down choose Duplicate.
- Rename duplicate to BlueStone.
- Menu-Colors-Map-Gradient Map. Give it a second and image should turn to blue/gray color.
Duplicate GreyBump again, move that layer so it is above BlueStone layer and rename it to OrangeStone. - Duplicate OrangeStone layer. With OrangeStone copy layer selected go to Menu-Colors-Invert. In Layer Dialog box set layer mode to Difference.
- Merge OrangeStone copy layer (right click-drop down-Merge Down) onto OrangeStone.
- With OrangeStone layer selected go to Menu-Layer-Transform-Offset. In pop up enter 512 for X and Y.
- With OrangeStone layer selected go to Menu-Colors-Curves.
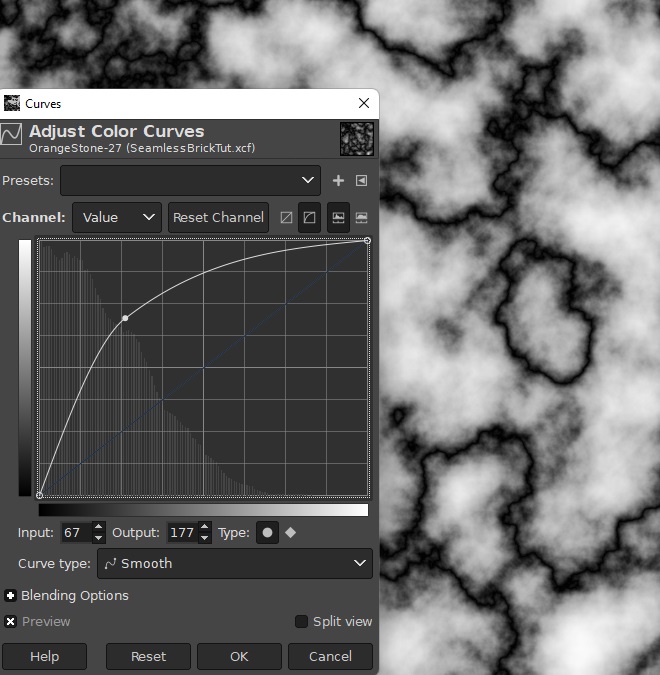
In Pop up move curve like so or enter values 67 for input and 177 for Output.
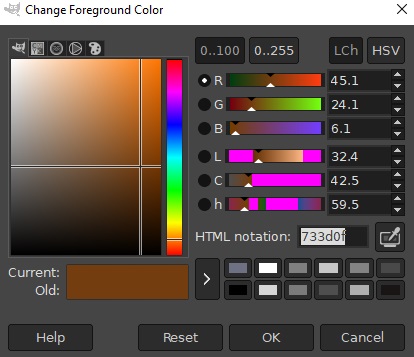
In Color pick set Foreground color to HTML notation 733d0f and Background to black. HTML notation ffffff.
- With OrangeStone layer selected go to Menu-Colors-Map-Gradient Map. Give it a second and image will turn into Orangy/Black.
- Now we are going to use bump map on BlueStone layer. In layers dialog box hide OrageStone layer by clicking eye icon next to layer.
- Select BlueStone layer then go to Menu-Filters-Map-Bump Map.
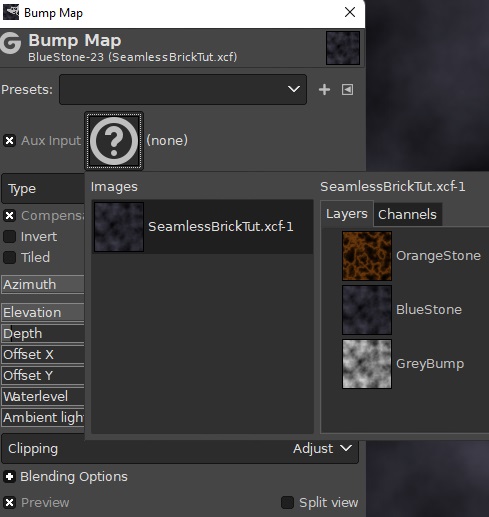
In pop up set Aux Input to OrangeStone layer.
Put check in Invert and Tiled. Enter 20 for depth and hit okay.
- In layers dialog box unhide OrangeStone layer and set it's mode to Dodge. If you feel that Orangy/Rusty color is to much use opacity to control it. I did set mine to 60. Once satisfied merge OrangeStone layer onto BlueStone.
- Now we are going to use BumpMap again. But this time use GreyBump layer.
- With BlueStone layer selected go to Menu-Filters-Map-Bump Map. In Aux Input select Grey Bump layer. Put check mark for Tiled and enter 22 for Depth.
Here is my texture.
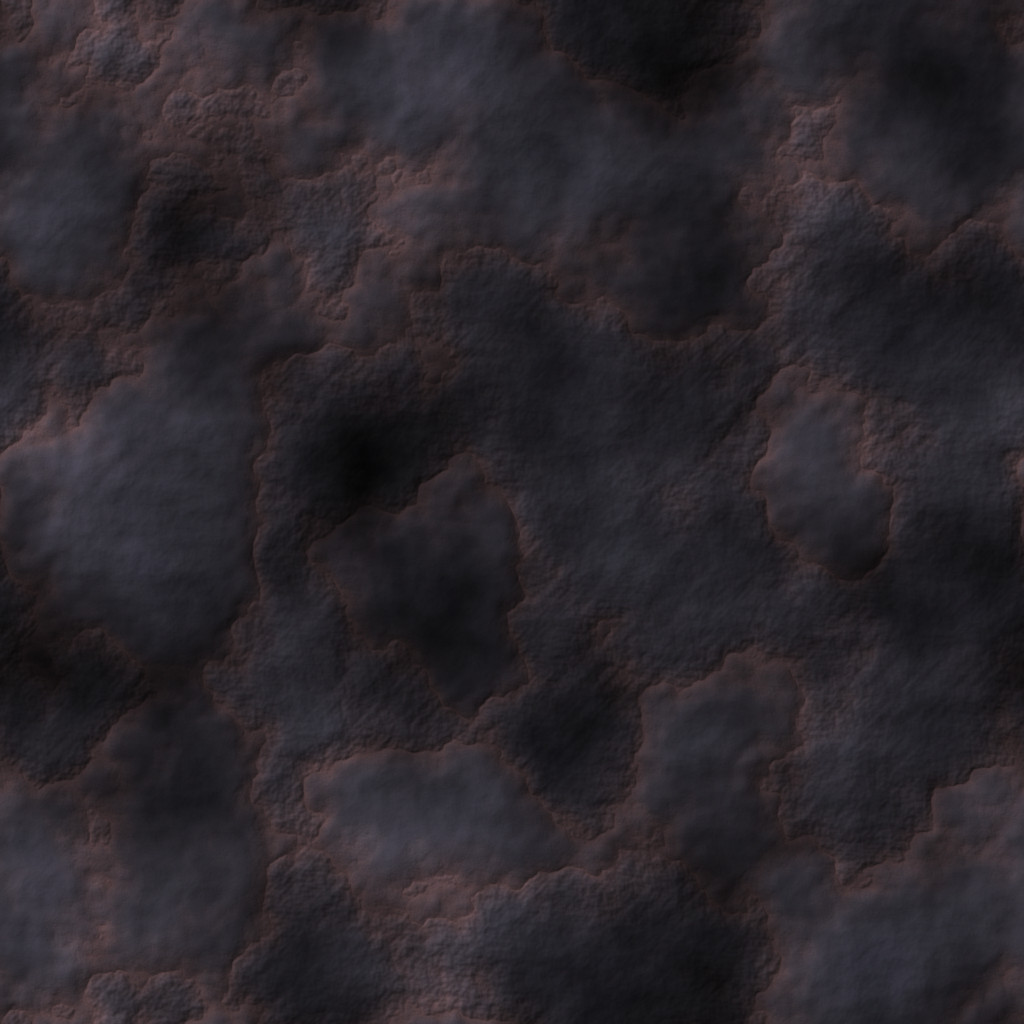
Step 3
Time to build our bricks! We need some guides so we can build brick wall.
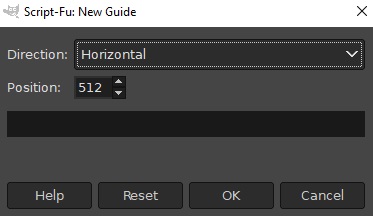
Menu-Image-Guides-New Guide. In pop up enter 512 for Horizontal.
Repeat this process and this time enter 384. Then 256 and then 128.
Do exactly same thing but this time set guides for Vertical.
Menu-View-Guides and put check mark in Snap to Grid and Snap to Canvas Edges.
- Make sure you have nothing selected on canvas so just in case Menu-Select-None or shortcut Shift Ctrl A. Go back to your Lonely Brick file. If you closed it re open it again. Menu-File-Open. Or look above viewport, right under Menu there will be thumbnails for your files. Just click on brick. Make sure brick layer is selected. We called it Grey. Hit Ctrl A to select all and then Ctrl C to copy it. Go back to 1024 canvas, where we have guide lines and stone texture.
- Create new layer. Menu-Layer-New Layer or use shortcut Shft Ctrl N. Make sure in pop up fill with is set to transparency. Rename newly created layer to Bricks.
- Hover over the canvas and using shortcut Ctrl V paste brick. Hit M shortcut for move or navigate to Tool Box and find it there. Position Brick among guides. Zoom in well to make sure it is right on the guide or else texture will not tile seamless.
- In the layer dialog box will be a new layer above Bricks layer called Floating Selection (Pasted layer) Right click it and from drop down chose Anchor Layer.
Continue populating canvas with bricks.
So it looks like this.
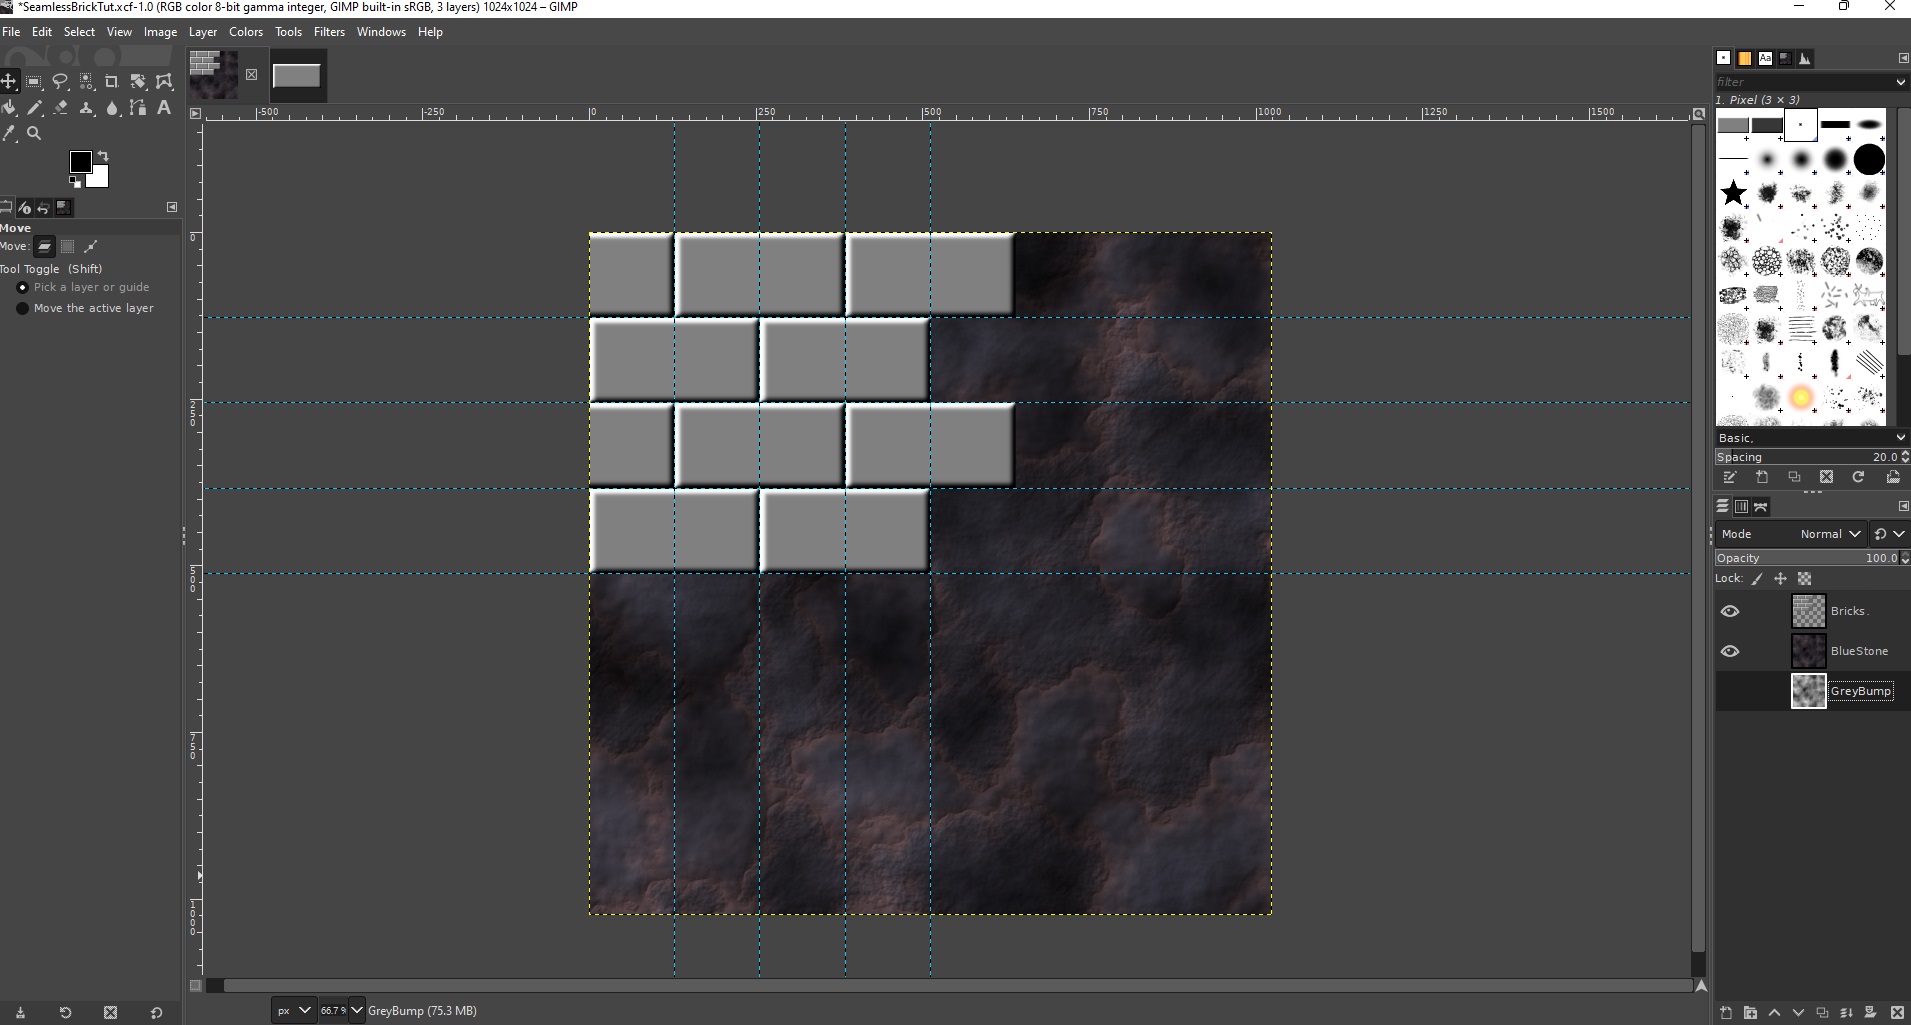
- We need to make sure that Bricks layer is same size as image. As you can see there is yellow outline extending over the image. To do so select layer Bricks. Menu-Layer-Layer to Image Size.
- In Tool Box select Rectangle select tool. By default it should be set to just that but if for some reason it is not, right click on tool itself and from drop down choose Rectangle.
- Using Rectangle tool select 512x512 area of brick population :) Make sure selector snapped to edges and guides. Once selection is made copy it to clipboard again Ctrl C.
- Hit Shift Ctrl A or Menu-Select-None to clear selection.
- Paste 512 bricks population :) onto canvas Ctrl V.
- With move tool position is under the first area.
Like this.
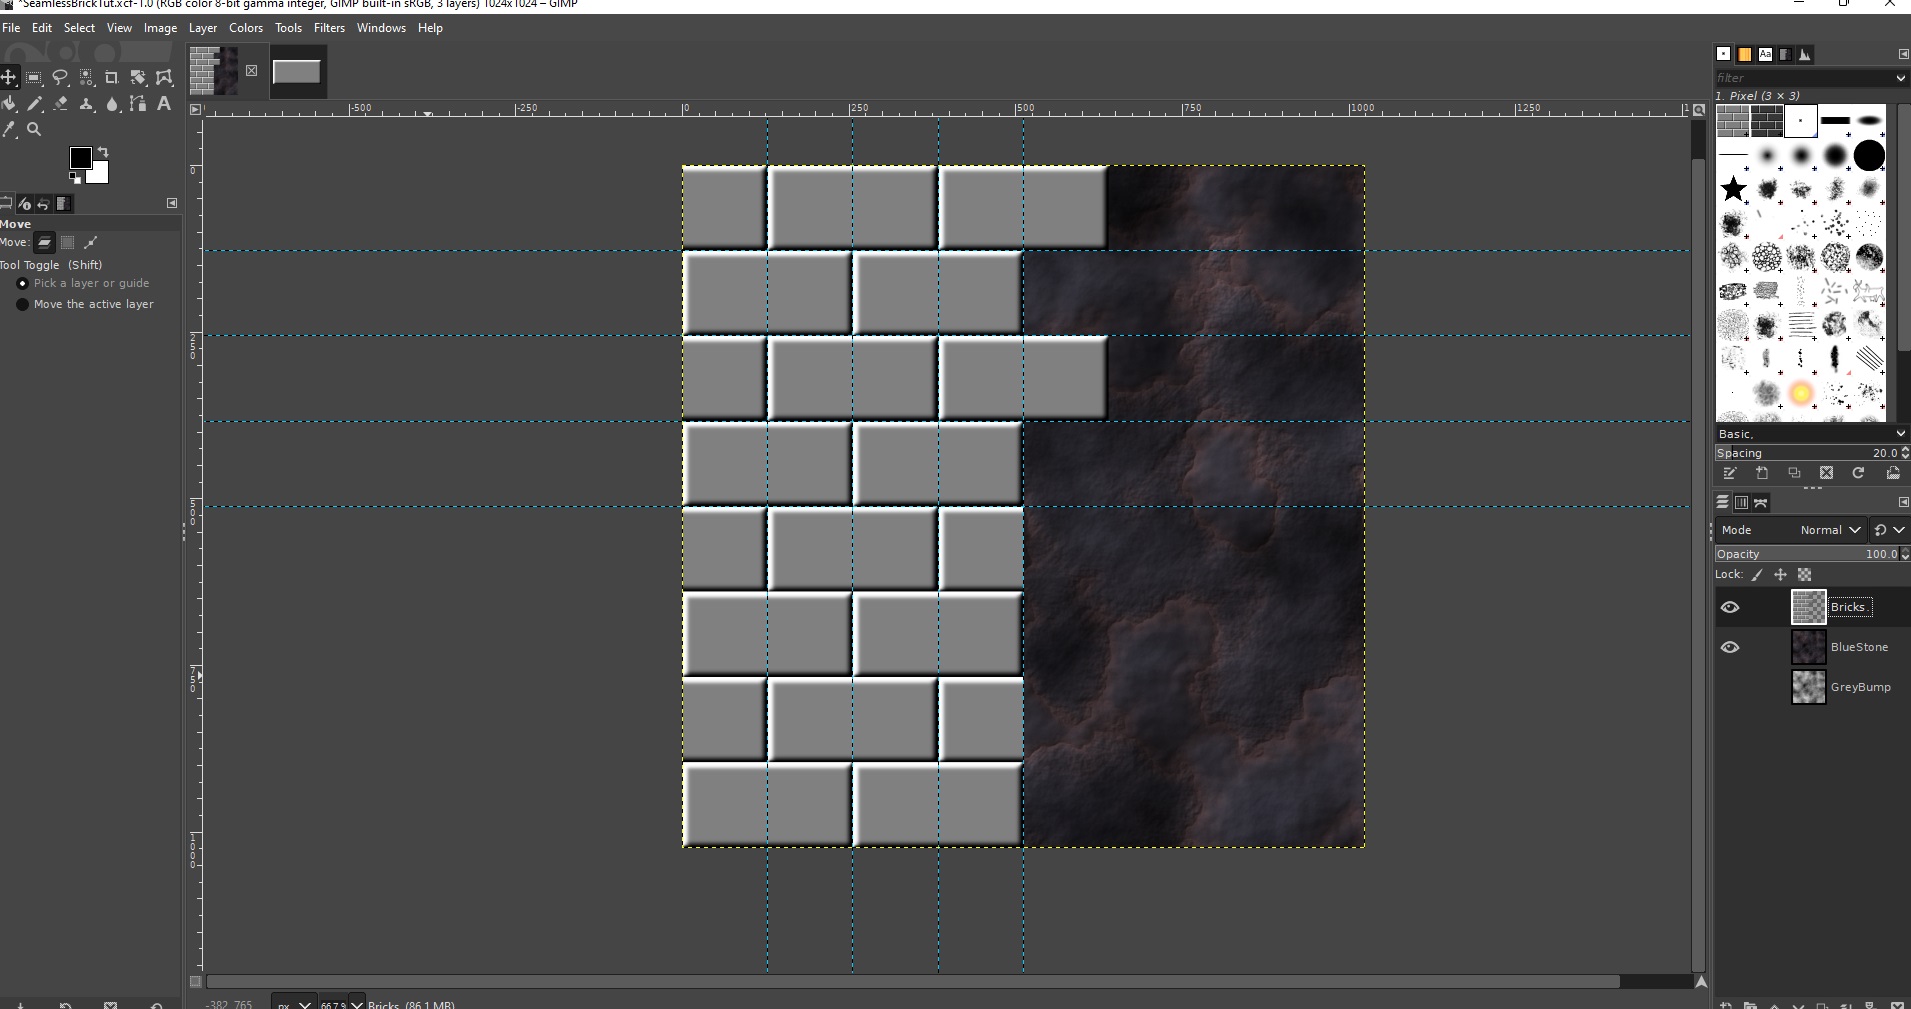
- Continue with Pasting bricks to fill top and bottom right side of canvas.
- Once canvas is filled in order to remove guides. Menu-Image-Guides-Remove All Guides.
- Set Bricks texture mode to overlay. Merge Bricks layer onto BlueStone and voile! Strangely enough BlueStone texture has turned into reddish but it is what it is :)
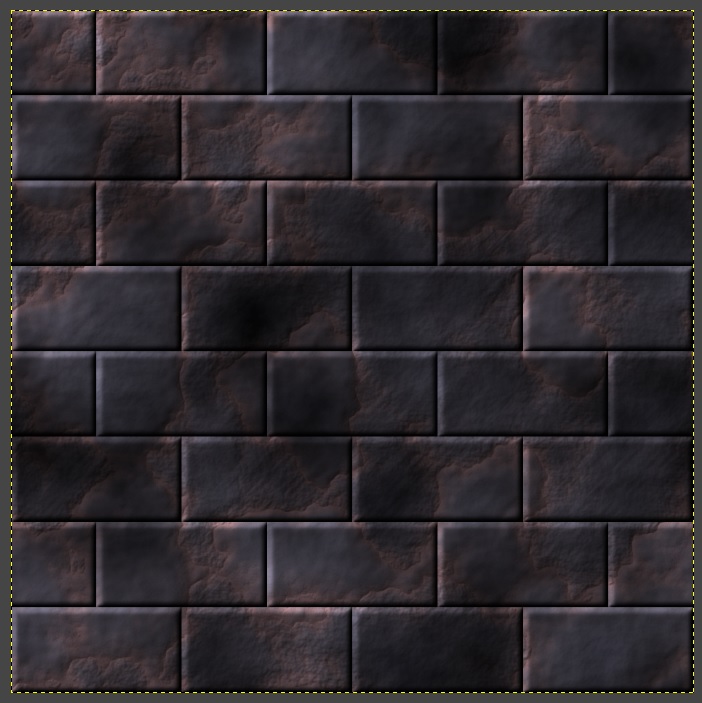
- Here it is. But I wanted to break that bump pattern and give some bricks over all a bit more character. If you are satisfied just skip below step.
- In order to do that, lets duplicate BlueStone layer. And rename it to RustyStoneSmooth. Lets duplicate RustyStoneSmooth layer and rename it to RustyStoneRough. We need to create another map to use as bump on RustyStoneRough layer.
Step 4.
- Create new layer. Name it MoreBump. With newly created layer selected go to Menu-Filters-Render-Noise-Solid Noise.
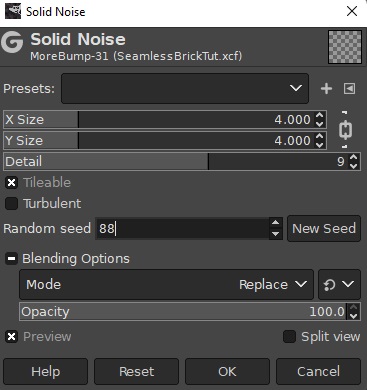
In pop up put check mark in Tileable, Detail 9 and Random seed 88.
- Duplicate MoreBump layer and with MoreBump copy selected go to Menu-Colors-Invert.
- In Layer Dialog menu set MoreBump copy mode to Difference.
Merge MoreBump copy onto MoreBump.
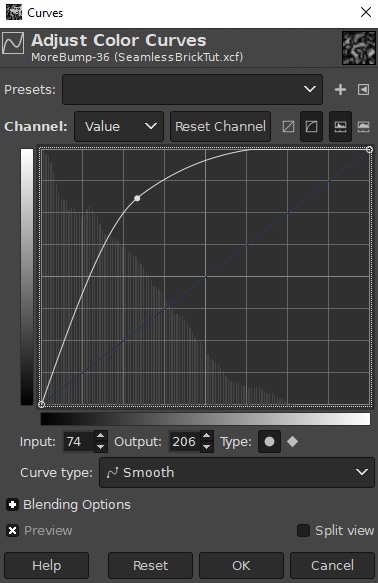
With MoreBump layer selected go to Menu-Colors-Curves. In pop up adjust curve like so just about or enter values Input 74 and output 206. It does not have to be exact. Overall, we just need some more light color info.
- With MoreBump layer selected go to Menu-Colors-Invert.
- Hide MoreBump layer by clicking on the eye icon next to it in layers dialog.
- With RustyStoneRough layer selected go to Menu-Filters-Map-BumpMap.
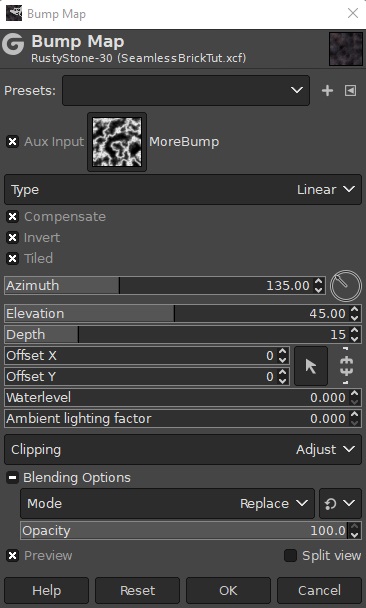
In pop up for Aux Input chose MoreBump layer. Enter 15 for Depth, put check mark in Invert and Tiled.
- In the layer dialog box we should have RustyStoneRough layer positioned above RustyStoneSmooth layer.
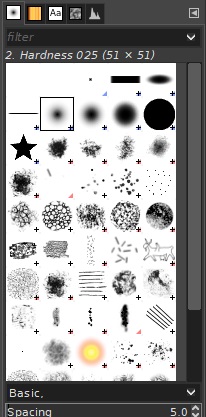
Select fuzzy brush.
- And in Tool Box select eraser tool.
- Basically we are going to erase some bricks and portions of bricks so the RustyStoneSmooth layer showing through. That will greatly break the bump map pattern. Be careful erasing the very edge bricks if you want to keep texture seamless. So work on center bricks. And then offset both layers RustyStoneRough and RustyStoneSmooth by going to Menu-Layer-Transform-Offset. And in pop up enter 512. Then work some more on center bricks. Once done, you can offset both layers again or leave them as is.
- Once happy merge RustyStoneRough layer onto RustyStoneSmooth.
- Can fiddle around with bricks some more by repeating Step 2. Just use different presets for Solid Noise. Perhaps enter different values for Random seed and use different colors for gradient map. And also Step 4 for new texture.
- Then position different noise algorithm and color texture on top of each other and using precise size of rectangle select tool the 128 by 256, delete random bricks. Taking care of edge bricks by offsetting both layers.
- I did just that :) And here is my seamless brick texture.
