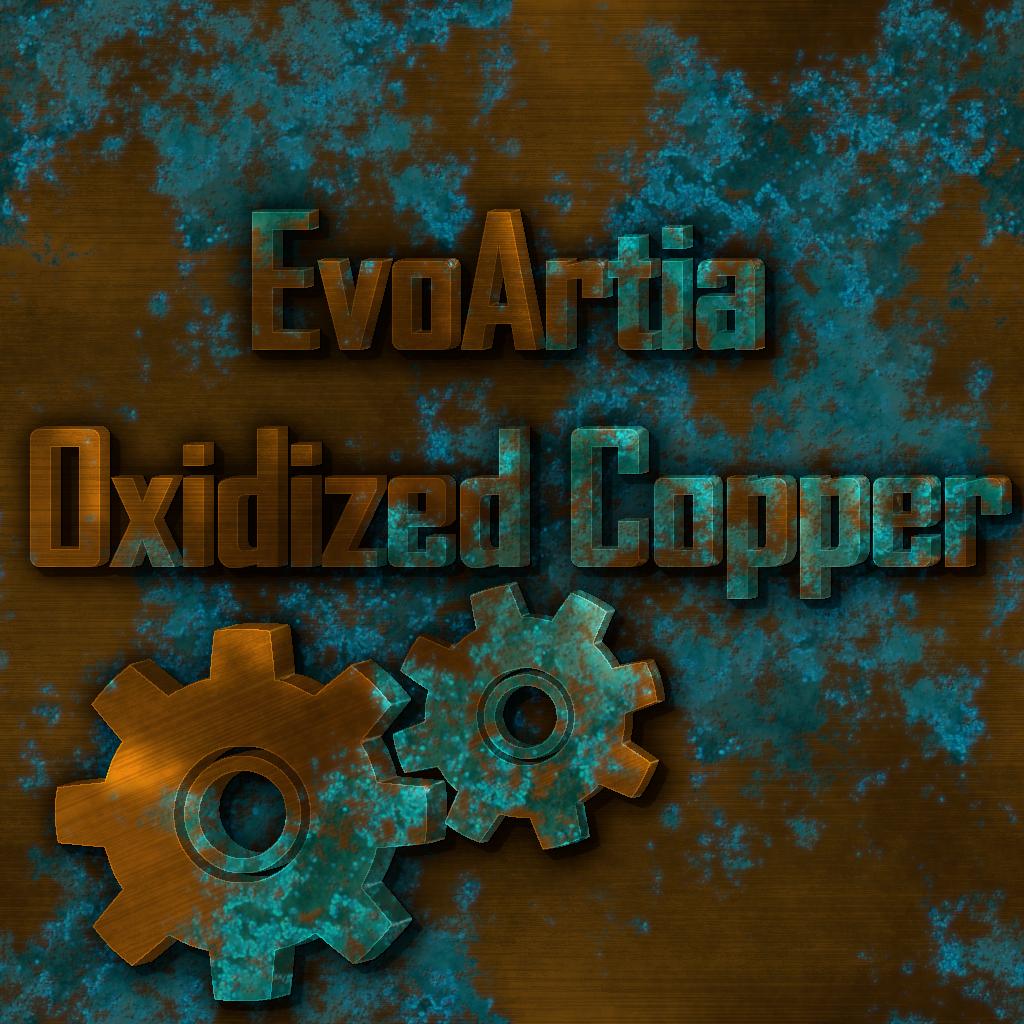
Seamless Oxidized Copper Tutorial
This is tutorial for Gimp version 2.10.30
Seamless oxidized copper texture.
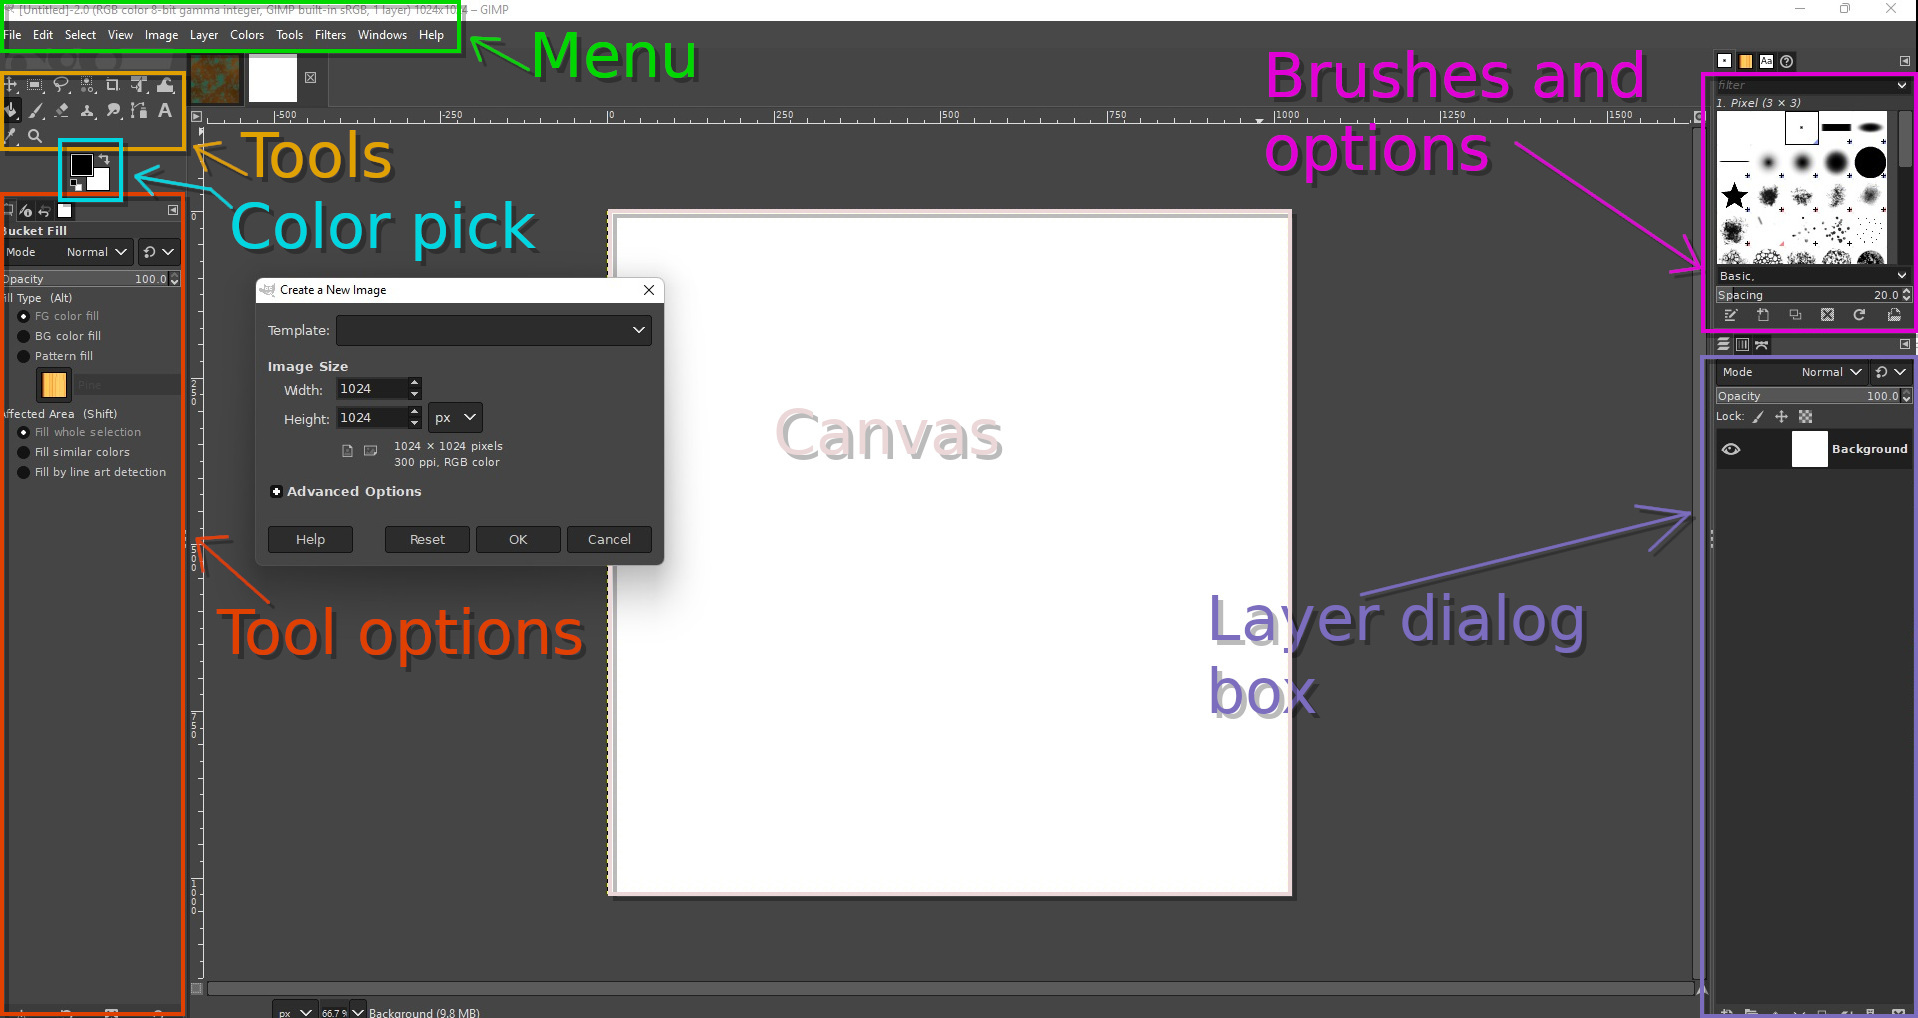
Hence trying to write tutorial beginner friendly as much as possible here is an image of areas I will be referring to. To zoom in and out of canvas hold down ctrl+scroll wheel. While zoomed in, to navigate left and right hold down shift+scroll wheel. Up and down just scroll wheel. Or just use scroll bars.
Step 1.
- Fire up Gimp, Menu-File-New, or shortcut ctrl+N. In pop up enter 1024 image size for x and y.
- In the layer dialog box new layer will appear called Background. Lets rename it to CopperColor. Double click on Background text next to layer as soon it highlights start typing then press enter.
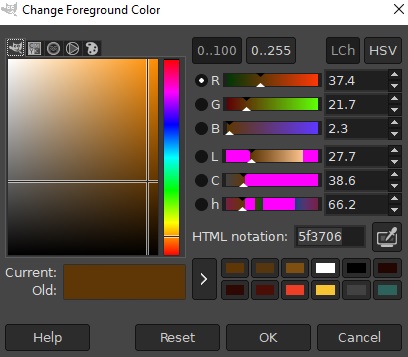
Navigate to color pick, click Foreground and in pop up menu enter HTML notation 5f3706. Or adjust your base copper color further.
- In Tools selection box, find and select bucket fill tool. Then click anywhere on canvas to fill layer with color.
- Save your work. Menu-File-Save as. When choosing this option Gimp will save file as .xcf. It is nice, because all layers will be saved and can always adjust them. In order to save image using different extension go to Menu-File-Export as. In pop up window below will be + sign. Click on it and choose extension desired. For now we will work with .xcf.
- Next we need some sort of color variations for CopperColor. Create new layer. Menu-Layer-New layer, or shift + ctrl + N (shortcut). In pop up leave everything as is, just make sure that Fill with is set to transparency. By default it should be just that. In layer dialog box you will see new layer named layer positioned above CopperColor. Make sure newly created layer is selected (highlighted).
- Menu-Filters-Render-Noise-Plasma. Leave presets in pop up menu as is and hit ok.
- Menu-Filters-Map-Tile seamless. Leave presets in pop up as is.
- Menu-Colors-Desaturate-Desaturate. Same leave presets in pop up as is and hit ok.
- Menu-Colors-Invert.
- In layer dialog box set layer mode to Overlay and set opacity to 80.
- In layer dialog box right click on layer layer and from drop down choose Merge Down.
- In layer dialog box we now have just one layer called CopperColor.
Step 2.
- We need actual oxide grunge texture now.
- Create new layer. Menu-Layers-New layer. Or Shift+Ctrl+N shortcut. Make sure in pop up fill with is set to transparency. In layer dialog box rename layer to OxidGrunge.
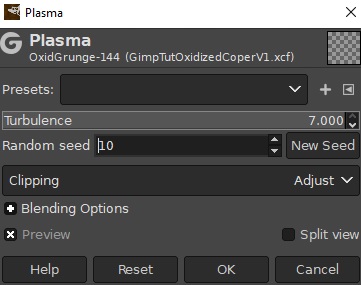
Select OxidGrunge layer and go to Menu-Render-Noise-Plasma. In pop up enter 7 for Turbulence and set Random seed to 10.
- Menu-Map-Tile Seamless.
- Navigate to color pick and set foreground color to HTML notation 0d6776.
- Menu-Colors-Map-Gradient map. Give it a second and layer will turn dark cyan color.
- Create new transparent layer on top of OxidGrunge. Menu-Layers-New layer. By default, new layer will be called just that – layer.
- Make sure new layer is selected Menu-Render-Noise-Plasma. In pop up enter 7 for Turbulence and set Random Seed to 15 this time.
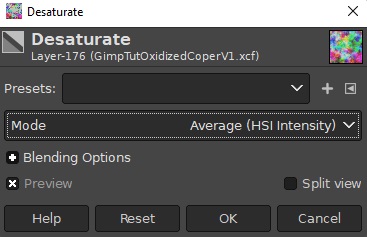
Menu-Colors-Desaturate-Desaturate. Set mode to Average (HSI intensity).
- Menu-Filters-Map-Tile Seamless.
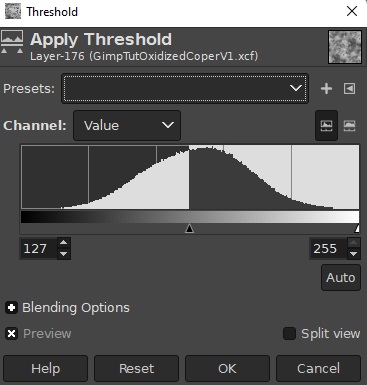
Menu-Colors-Threshold. And in pop up leave presets as is.
- There will black and white image, we need to delete white color. Menu-Select-Select by color. Touch white color on canvas to select it.
- Menu-Edit-Clear or use delete key on keyboard. Once white is deleted, we need to deselect. Menu-Select-None or Shift+Ctrl-A shortcut.
- In color pick set foreground color to HTML notation 2ca0a2.
- Now we need to select black color and change it. Menu-Select-Select by color. This time touch black. Once selection is made navigate to Tool box and select bucket fill tool. Touch inside selection and fill it with foreground color and then deselect all.
- In layer dialog box set layer mode to Overlay. Merge layer (right click - drop down - merge down) onto OxidGrunge.
- In layer dialog box right click on OxidGrunge layer and from drop down choose duplicate. By default it will be called OxidGrunge copy.
- OxidGrunge copy layer selected Menu-Filters-Edge-Detect-Edge. In pop up leave presets as is.
- In layer dialog box set OxidGrunge copy layer to mode Overlay. Set opacity to 80. Merge OxidGrunge copy layer onto OxidGrunge.
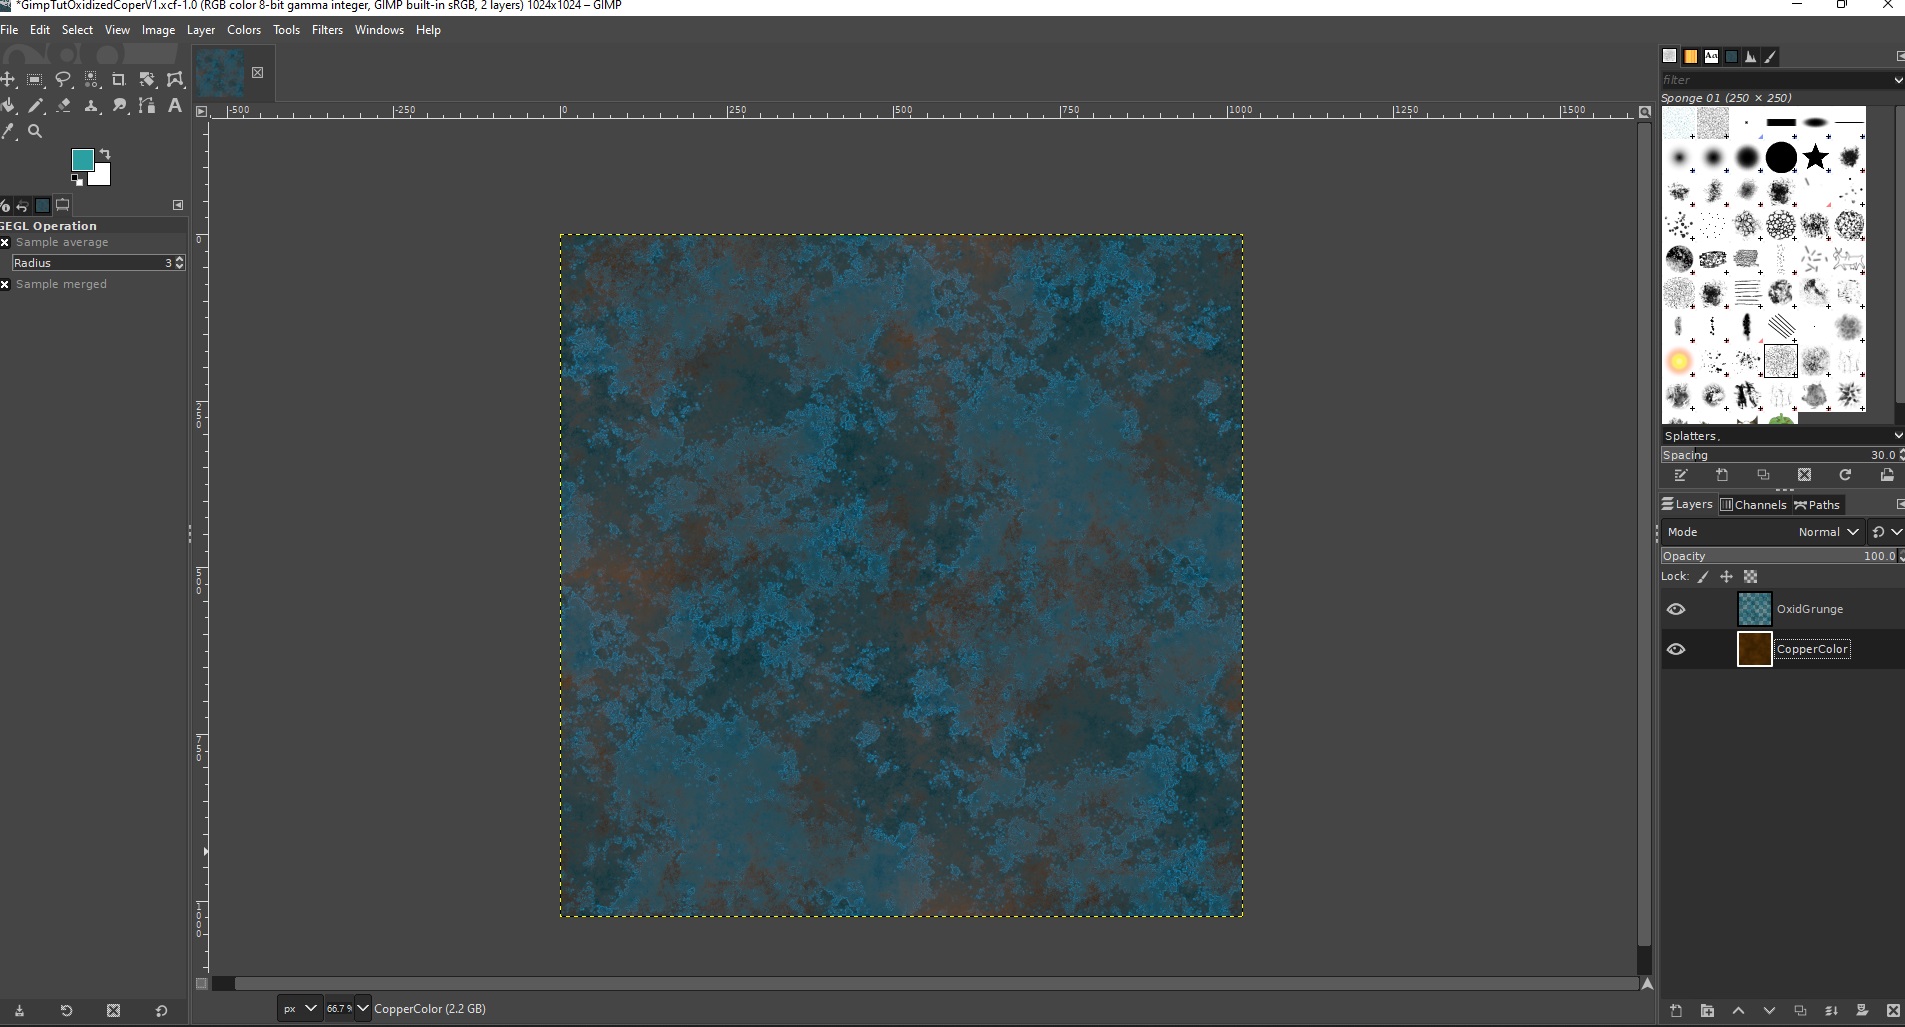
- We are back to just two layers in layer dialog box. So far this is what I have.
Step 3.
- So we need to trim grunge a bit or else it's way to grungy :)
- Create new layer and rename it to GrungeTrimBW.
- GrungeTrimBW layer selected go to Menu-Filters-Render-Noise-Plasma and in pop up enter Turbulence 4 and Random seed 3.
- Menu-Filters-Map-Tile Seamless.
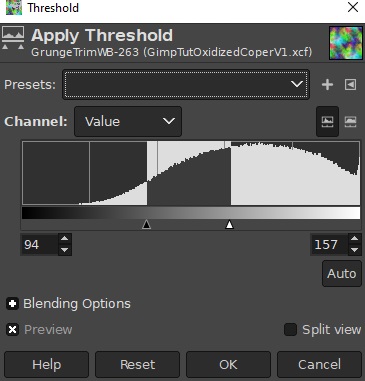
Menu-Colors-Threshold. Enter 94 for left value and 157 for the right.
- Hide GrungeTrimBW layer by clicking on eye icon next to it in layer dialog box.
- Duplicate CopperColor layer by right clicking on it and from drop down choose Duplicate. Rename duplicate to CopperFinal. Hide CopperColor layer.
- Duplicate and then hide OxidGrunge layer as well. Rename duplicate to OxidGrungeFinal.
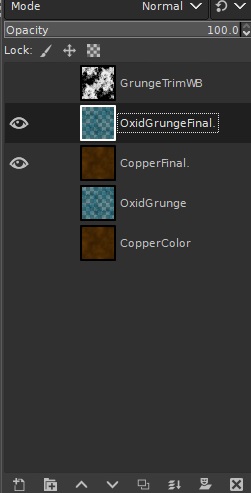
In layer dialog box, way at the bottom are up and down arrows. Using arrows will move selected layer up or down. So far this is how the stack looks. GrungeTrimWB(hidden), OxidGrungeFinal, CopperFinal, OxidGrunge(hidden), CopperColor(hidden)
Step 4
- Yay! We are on finishing stretch. Select and unhide GrungeTrimWB layer. Menu-Select-By Color.
- Inside canvas click on black color of GrungeTrimWB layer to make selection.. Once selection is made hide GrungeTrimWB layer again.
- Select OxidGrungeFinal layer. We are going to delete parts of it using resent selection. So either use delete key on keyboard or Menu-Edit-Clear.
- Deselect all. Menu-Select-None or Shift+Ctrl-A.
- OxidGrungeFinal layer is a bit to transparent so select it and duplicate. Merge OxidGrungeFinal copy layer (right click-drop down-merge down) onto OxidGrungeFinal. So the colors are less transparent and more vibrant.
- Duplicate OxidGrungeFinal layer again. With OxidGrungeFinal copy selected Menu-Filters-Edge-Detect-Edge. In pop up leave default values and hit ok.
- In layer dialog box set OxidGrungeFinal copy layer to mode Overlay and set opacity to 40.
- Merge OxidGrungeFinal copy onto OxidGrungeFinal.
- Duplicate OxidGrungeFinal layer again and rename copy to OxidGrungeBlur.
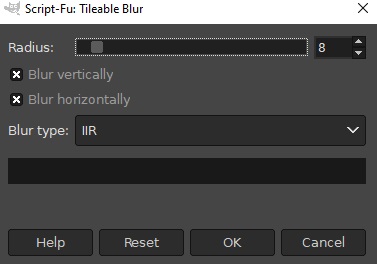
OxidGrungeBlur selected Menu-Filters-Blur-Tileable Blur. In pop up enter 8 (pixels) and hit ok.
- Move OxidGrungeBlur layer under OxidGrungeFinal, yet it should be above CopperFinal.
- Make sure OxidGrungeBlur layer is selected, go to Menu-Filters-Map-Bump map.
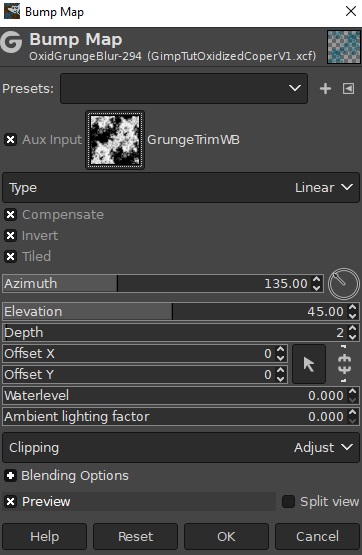
In pop up for Aux input select GrungeTrimWB layer. Sometimes Gimp is finiky about it and takes couple tries. So just make sure layer is shown there.
Put check marks in Invert and Tiled. Set Depth to 2.
- Merge OxidGrungeFinal onto OxidGrungeBlur.
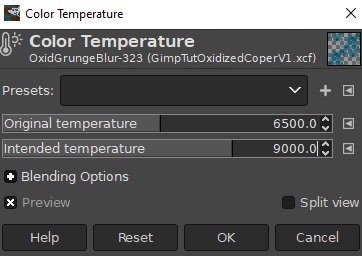
At this point I wanted colors to be a bit more toward green. So I adjusted them by going to Menu-Colors-Color Temperature. In pop up enter 9000 for Intended temperature. There are lots of different ways to adjust colors but this option suited just fine. I like gloving oxidization!
- I also adjusted CopperFinal layer same way. Only in Intended temperature entered 5000 to make it a bit darker.
- If you need more controlled color adjustments in Menu-Colors, there are plenty options. One can experiment with all of them! By the way Ctrl+Z is a great way to undo steps.
- In layers dialog box merge OxidGrungeBlur layer onto CopperFinal.
- CopperFinal layer selected Menu-Filters-Blur-Tileable Blur. In pop up enter 2 for Radius.
- The whole thing looks very new so some scratches would be nice :) But if you are happy then skip Step 5.
Step 5
- Duplicate CopperColor layer and rename it to Scratches. Move it so it is above CopperFinal and unhide.
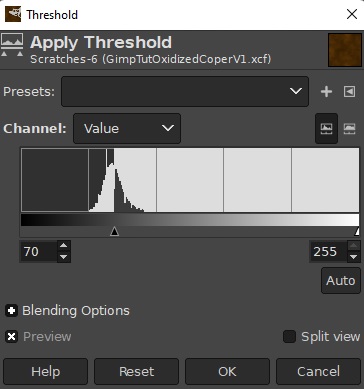
With layer Scratches selected Menu-Colors-Threshold. And set left value to 70.
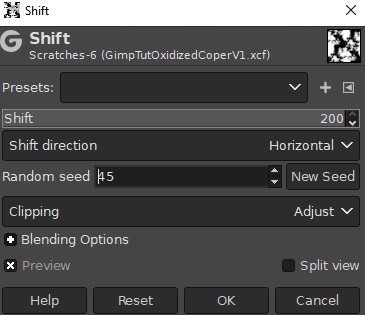
Menu-Filters-Distorts-Shift. Set Shift to 200 and Random seed to 45.
- Menu-Layers-Layer to image size.
- Menu-Filters-Tile Seamless.
- So we still have GrungeTrimWB layer that is hidden and positioned above layer Scratches. Select and unhide GrungeTrimWB layer and head to Menu-Select by color.
- On canvas select white color of GrungeTrimWB layer and once selection is made hide GrungeTrimWB layer in layer dialog box. Select layer Scratches and hit delete key or Menu-Edit-Clear. Then deselect all. Shift Ctrl A or Menu-Select-None.
- In layer dialog box duplicate layer Scratches and hide it.
- Select duplicate layer. By default, it will be called Scratches copy. Move it so it is above CopperFinal layer.
- Set layer Scratches copy to mode Overlay and set Opacity to 8.
- Merge layer Scratches copy into CopperFinal.
And we are done! Here is my seamless Oxidized Copper texture.
